Radio Selection
EmComm Tools Community uses a command line tool called et-radio for letting the system know which radio is about to be plugged in. Only limited radios are supported by the platform. They are listed in the Supported Equipment section.
A graphical user interface will be introduced in the R6 release that will provide the same functionality as et-radio.
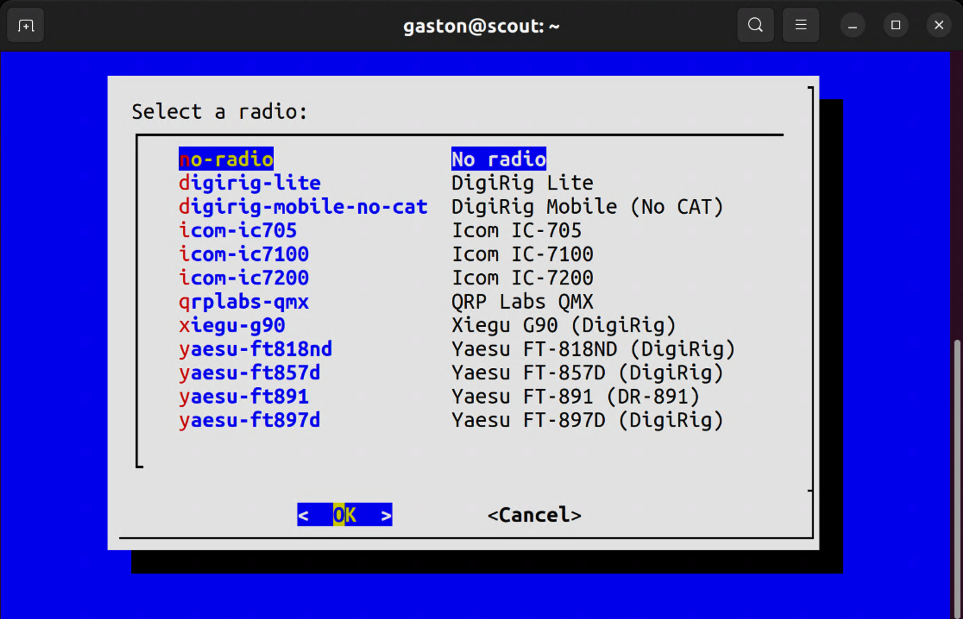
Any time that you decide to switch radios, run et-radio. Then, use the up and down arrow keys to select your radio. This simply lets the platform know which radio is about to be plugged in.
Once a radio is selected, you will be presented with instructions on how to configure your radio. Some radios are more involved than others (i.e. FT-891).
The Radio Configuration Notes are based on the configuration settings needed on the radio following a factory reset.
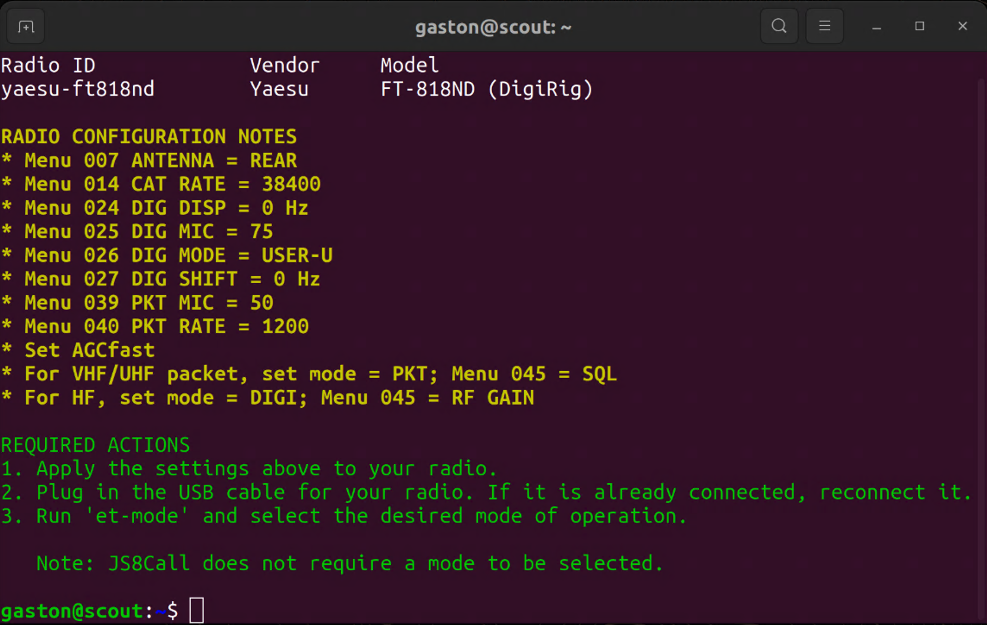
After your radio has been configured, turn it on and plug in the USB cable. If everything is working, you should see the System Information on the desktop update within 10 seconds.
General Usage
-
Run
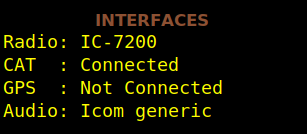
et-userand select the desired radio. The System Information on the Desktop should show your selection next to INTERFACES > Radio. -
Turn on your radio.
-
Configure your radio per the settings displayed by
et-radio. -
Connect the radio via the USB cable.
-
If everything is detected, the System Information on the Desktop should show CAT as Connected and display the audio card next to Audio.
Behind the scenes, the rig control service (rigctld) is automatically started when the USB interface for the radio is plugged in. This service is automatically stopped when the USB cable is disconnected. Rig control is automatically configured for every supported mode including JS8Call and fldigi. The user should not change the rig control or audio settings for any application. EmComm Tools Community does this as part of its plug-and-play subsystem.